Another Retro Post. This time, we're catching up on some (not-so) recent changes to the rack system mounted to the rear doors of the Astrolander.
After using
Version 1 of my our rear-door fuel storage rack for a while, I learned a few things. Namely, I learned that I needed more outdoor storage for dirty stuff and things that need to be accessed or put-away while the van is more or less "loaded".
More after the jump...
So, in Spring of 2016, looking forw
ard to the then-upcoming (and very successful) Summer 2016 Roadtrip, I made a bunch of changes to solve some of those issues. This was going to be our first long trip - 10 days of mixed road travel. Some was camping, some not, but unlike most of our previous trips, we'd be moving almost every day, so the making and breaking of camp and reloading the vehicle needed to be efficient and less of the pain in the ass than it had been lately.
To that end, I started on a number of small improvements. The first is to mount a rear cargo box on the door. I've been jealous of the full-size vans with their Aluminess bumpers with swing-away cargo boxes. Hell, even the Vanagon guys have a relatively inexpensive solution for this now (and I have looked at using the
GoWesty swing away add-on kit on a custom bumper). However, since I've already got this whole "door mounted rack" thing sort of figured out, and it fits with my "simpler and lighter is better" ethos for the van, I decided to stick with this method.
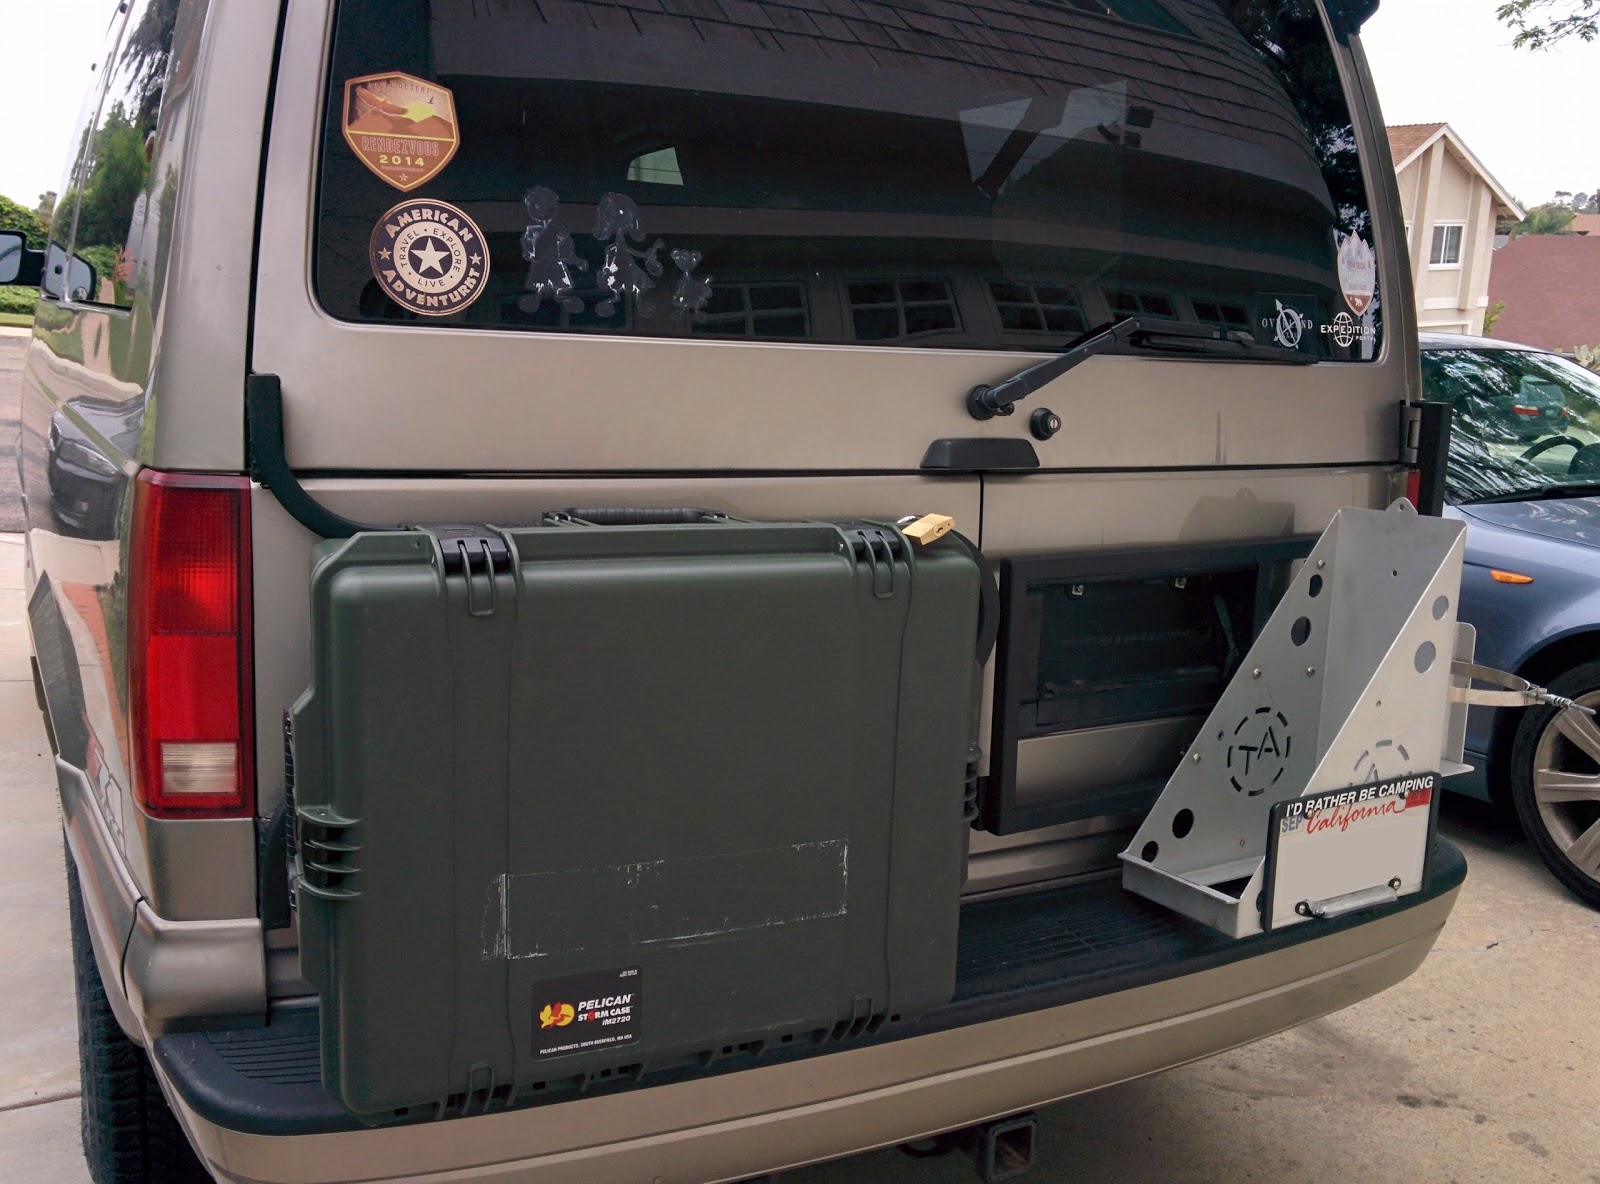
So, I decided to relocate the fuel cans from the driver's side rack (more on that later), and mount a Pelican Storm iM2720 to the rack.

First, I removed the rack and added a couple of extra mounting tabs. While I was modifying the rack, I also added a step to give myself a bit more sure footing. One of my favorite parts of the 1st draft of the rack was that I could use it to climb up to access my roof. The bad news was that the 1" square tube and uneven top surface of the fuel can made this a little precarious. This is MUCH safer and more comfortable.
This also gave me a chance to clean up some of the dodgy welds from my first attempt at this project. Apparently I'd left a pinhole somewhere on one of the top surfaces (probably where I capped the tube), and rain had gotten inside. Lots of gunky water came out when I flipped the rack over, and even with a lot of draining, I got a little steam when I re-welded all those seams. I'm getting much better with my new welder, though, so things are much cleaner now.

One of the big changes wasn't just to add new mounting tabs, though. I learned from the first iteration that fastening my Trasharoo over the rack was a little difficult because I had trouble feeding the clips over the top to snap them. (The rack sits very tight to the door skin.) As such, I modified the rack so that the part that fastens to the door edge and the main rack are joined by a removable pin. The plates are cut from a stainless steel hinge. Now I can pull the pin and pivot the rack away from the door by about 30 degrees. This is enough to monkey with Trasharoo straps and makes accessing the fasteners, etc. much more simple.

This started as a simple idea, but quickly got complicated in the little details. Since the passenger side opens first, I had to make sure that the pin, handle, etc. were all to the left of the "centerline", otherwise they wouldn't clear the passenger side door opening. Hence, it's sort of tucked back behind the rack. To make sure I could get my fat fingers in there on the handle, also had to space it out a bit farther from the door. No major issues, though.

Speaking of fasteners, here's how I mounted the case to the rack. Stainless cap screws and fender washers mate to nylock nuts. Originally, I had specifically purchased a Pelican case that included a "rolling suitcase" type arrangement, thinking that I would just re-use the mounting points for the roller frame (so that I could mount the case without making any penetrations.) However, it turns out that those mounting points are basically very small coarse thread screws (like wood screws) into a set of plastic bungs. They get their strength from the fact that it's distributed over 15 or so mounting points, and using just a few of them would likely not have been secure enough. Rather than try to align more than a dozen mounting tabs on the metal rack, I went this way and just used 1/4-20 bolts and fender washers. The other advantage of doing though-mounting like this is that the case sits flush to the rack, rather than spaced out by the bungs. Seems solid enough, but time will tell.

Here's the box snugged up to my new step, complete with some grippy-strips. Overall, this makes accessing the roof rack WAY easier.
I'll load this based on the trip, but usually it's been carrying my leveling blocks, air compressor, and the other things that I want to access quickly on the trail and not have to go digging into the main load area to get to. The leveling blocks in particular have been troublesome because they're always the LAST thing I want to put away after the rig is packed and I'm ready to drive off.
You can also see the lightweight "shelf" I added to be able to access the lower stuff without "stacking" everything.
All told, the Pelican doesn't stick out too much past the bumper, and it rides high. We'll have to see if this becomes a target for rear-ending, in the long run!
Having removed the fuel cans from the driver's side door, the next imperative was to build a second rack for the passenger door. This one was scratch-built, using more or less the same techniques. I've intentionally left a good chunk of the left side of the rack empty because I need some room at the middle of the bumper to stand when I'm climbing up to reach the roof rack.
A minor change from the previous draft is to mount the propane holder to the rack, instead of hanging it on the back of the jerry-can holder. I have no qualms about the strength of the can holder, it's just that mounting the old way meant that there was a bolt-head in a bad spot inside the can holder that was wearing on the fuel can.
A passenger-side rack means removing the factory passenger-side door pins. After bending a pair of 6" C-clamps trying to push them out, I decided it was time to make a tool. The bolt in the bottom of this tool is center-drilled and a series of hardened-steel pins can be inserted to press up on the hinge-pin. The top of the tool rests on the hinge, but has a through-hole for the pin to come through. Easy work, now, and much less "dramatic".
One more minor tweak - when there's a jerry-can in the holder, it blocks a chunk of the license plate. I tapped into the existing license-plate light circuit and brought out this trailer-wire connector via a grommet.
I attached this to an off-the-shelf license-plate-frame mounted LED light, and I'm good to go.
All told, I'm very pleased with yet another utility-expanding mod!
 First, I removed the rack and added a couple of extra mounting tabs. While I was modifying the rack, I also added a step to give myself a bit more sure footing. One of my favorite parts of the 1st draft of the rack was that I could use it to climb up to access my roof. The bad news was that the 1" square tube and uneven top surface of the fuel can made this a little precarious. This is MUCH safer and more comfortable.


No comments:
Post a Comment